
1. Installation
The voraus.core can be installed and used for two scenarios. The main use case is to use the software with a real robot. Alternatively, the software can be installed and used virtually for evaluation purposes on a local device via Docker. Follow the chapter Installation for Virtual Evaluation Systems for detailed information.
1.1. Installation for Virtual Evaluation Systems
Note
This section covers the installation and management of virtual evaluation systems. The virtual systems are only for showcasing purposes and not capable of controlling real robots.
The voraus.core is delivered as a Docker image and can be executed on Docker-capable systems.
1.1.1. Prerequisites
The following software must be installed and configured on your machine before you can run the voraus.core.
Note
The software runs exclusively on x86 systems, ARM systems are not supported.
Windows WSL
Windows Subsystem for Linux v2 (WSL 2) must be enabled on your computer.
You can find more information in the Microsoft documentation.
Docker
Install Docker on your machine according to the official documentation.
Note
- If you are using Windows, make sure you are using
the WSL 2 backend and not the Hyper-V backend.
Powershell instead of the legacy CMD terminal for all Docker terminal commands in this documentation.
You can check whether Docker is installed and configured properly by entering the following command into your Terminal.
docker info
If the command exits successfully, i.e. displays information about the Docker installation, everything is installed correctly.
WIBU CodeMeter User Runtime
The voraus.core is protected and licensed with WiBu CodeMeter. In order to run the software it is necessary to install the CodeMeter User Runtime which can be downloaded from the WiBu Support Page or installed as a Linux package from the WiBu Package Repository.
For Windows Users
Select your operating system in the dropdown and download the newest version of the CodeMeter User Runtime.
Run the installer and follow the instructions.
Note
Make sure CodeMeter is configured as a Network Server during the installation.
If you already have CodeMeter installed and want to configure it as a Network Server, follow the instructions in the WiBu support section.
Further information and support during installation can also be found in the WiBu user guide at any time. Go to the support section of WiBu and select the CodeMeter Runtime Installation Guide.
For Linux (Debian and Ubuntu) Users
Linux distributions favor so-called package managers for a centralized distribution of software packages and their potential updates in a similar fashion to an app store for smartphones. The package manager for Debian, Ubuntu, and several other Linux distros is called apt. It allows voraus - as the package’s maintainer - to provide digitally signed versions of it and install/update them as requested by the user.
The two steps to install the package repo for Ubuntu and Debian can be found here.
Afterwards installing the latest WiBu CodeMeter Runtime is a simple apt call:
sudo apt install codemeter-lite
Updating the package subsequently happens along with all other package updates:
sudo apt update
sudo apt upgrade
1.1.2. Activate Licenses on Your Machine
After the WiBu CodeMeter User Runtime has been successfully installed, the licenses need to be activated on your machine. Open the license activation link in your browser, which was provided to you by the voraus support.
Note
The license activation link has the following format:
https://lc.codemeter.com/90377/depot/overview.php?id=XXXXX-XXXXX-XXXXX-XXXXX-XXXXX.
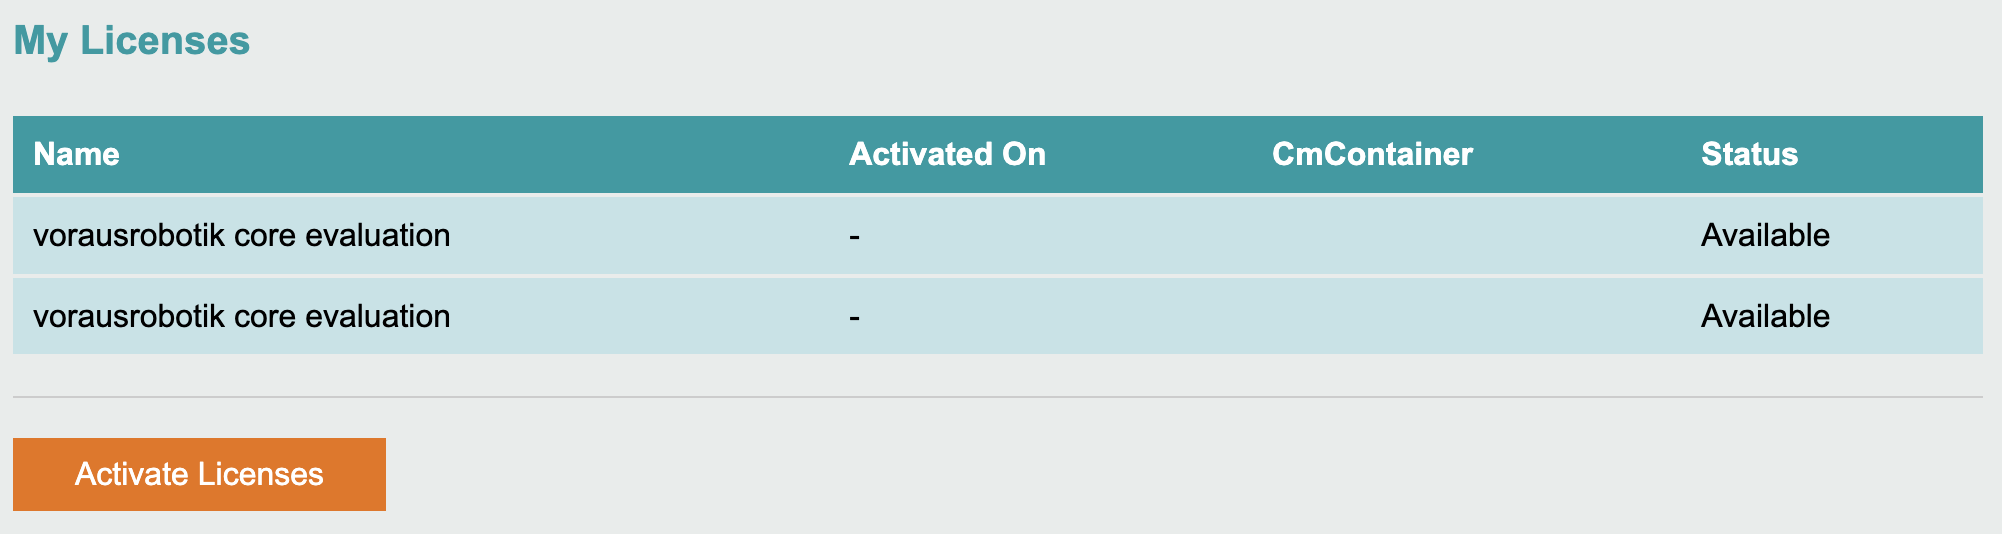
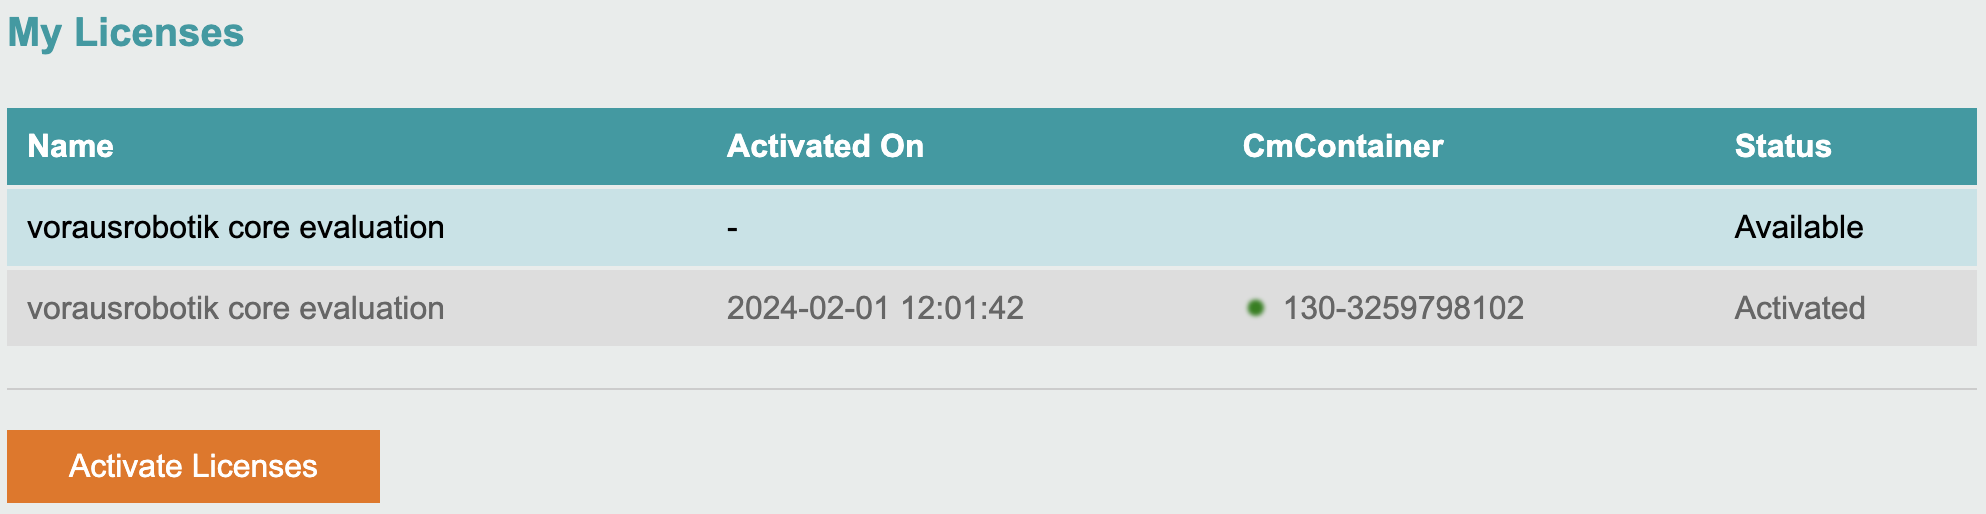
On the page that lists the available licenses (Fig. 1) click on Activate Licenses.
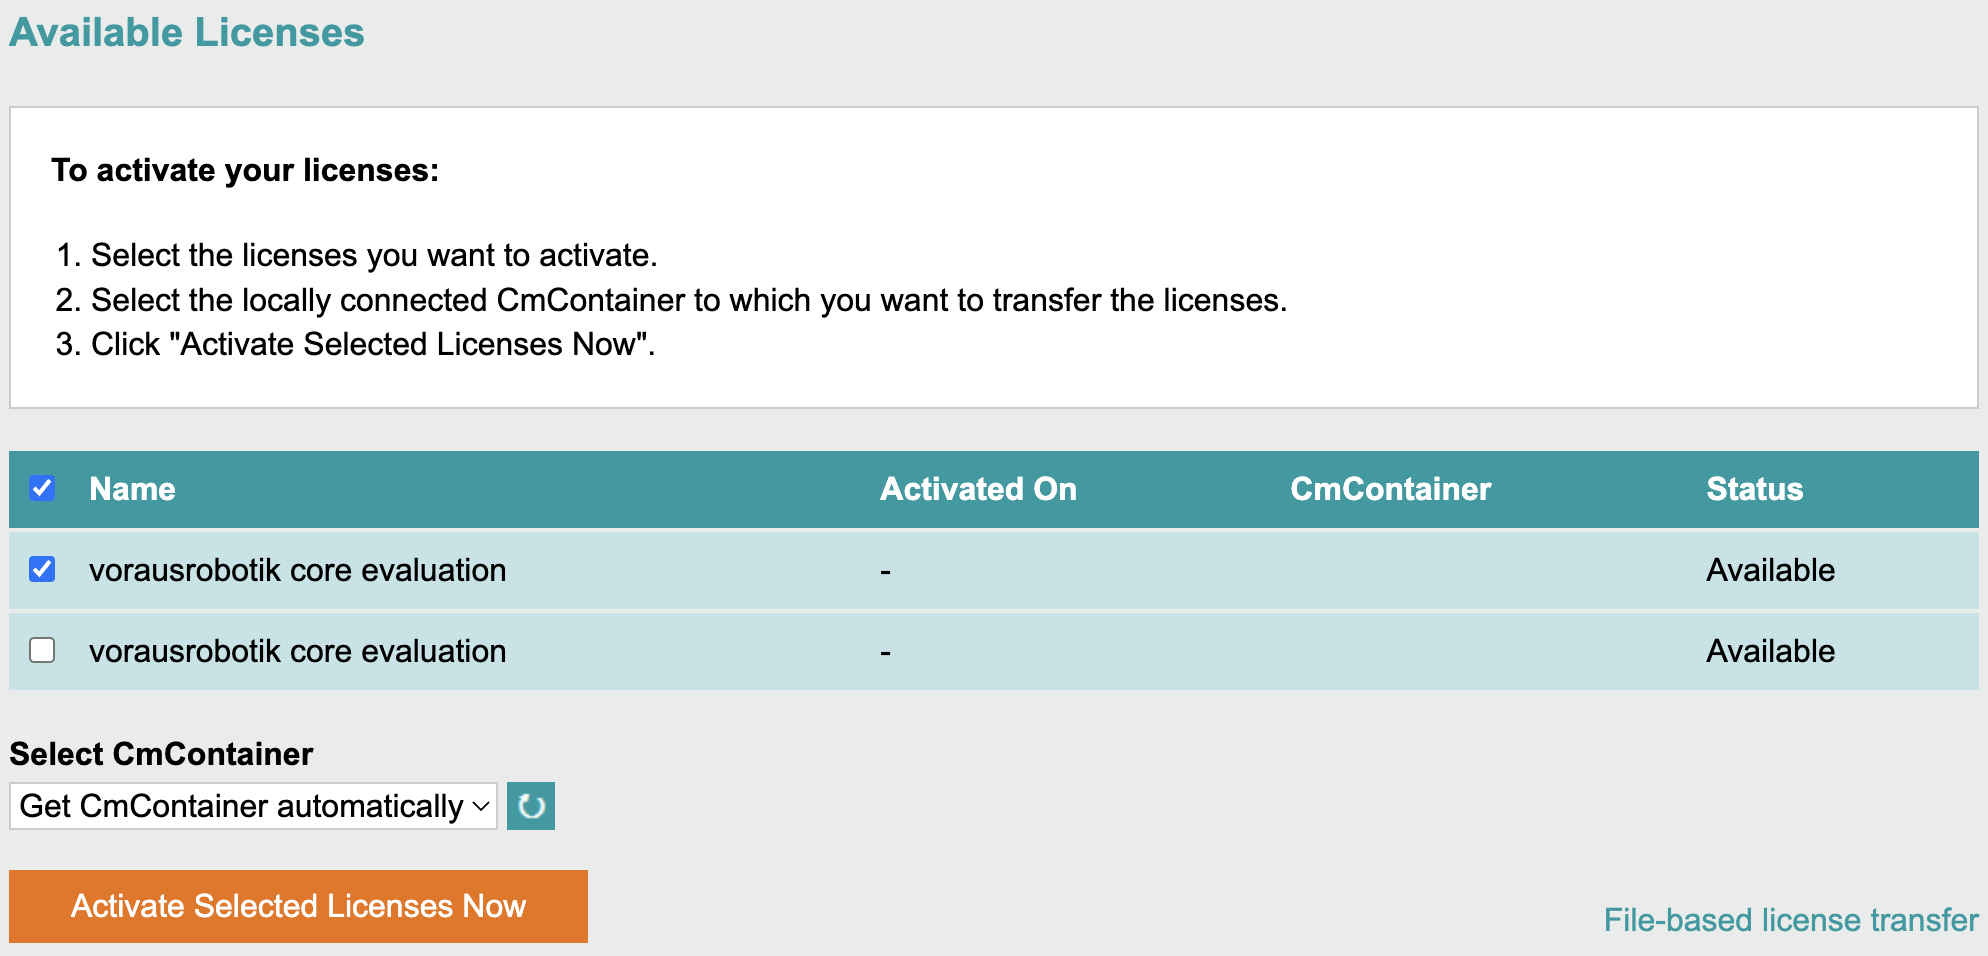
From the list of available licenses, select the first checkbox and click on Activate Selected Licenses Now as shown in Fig. 2.
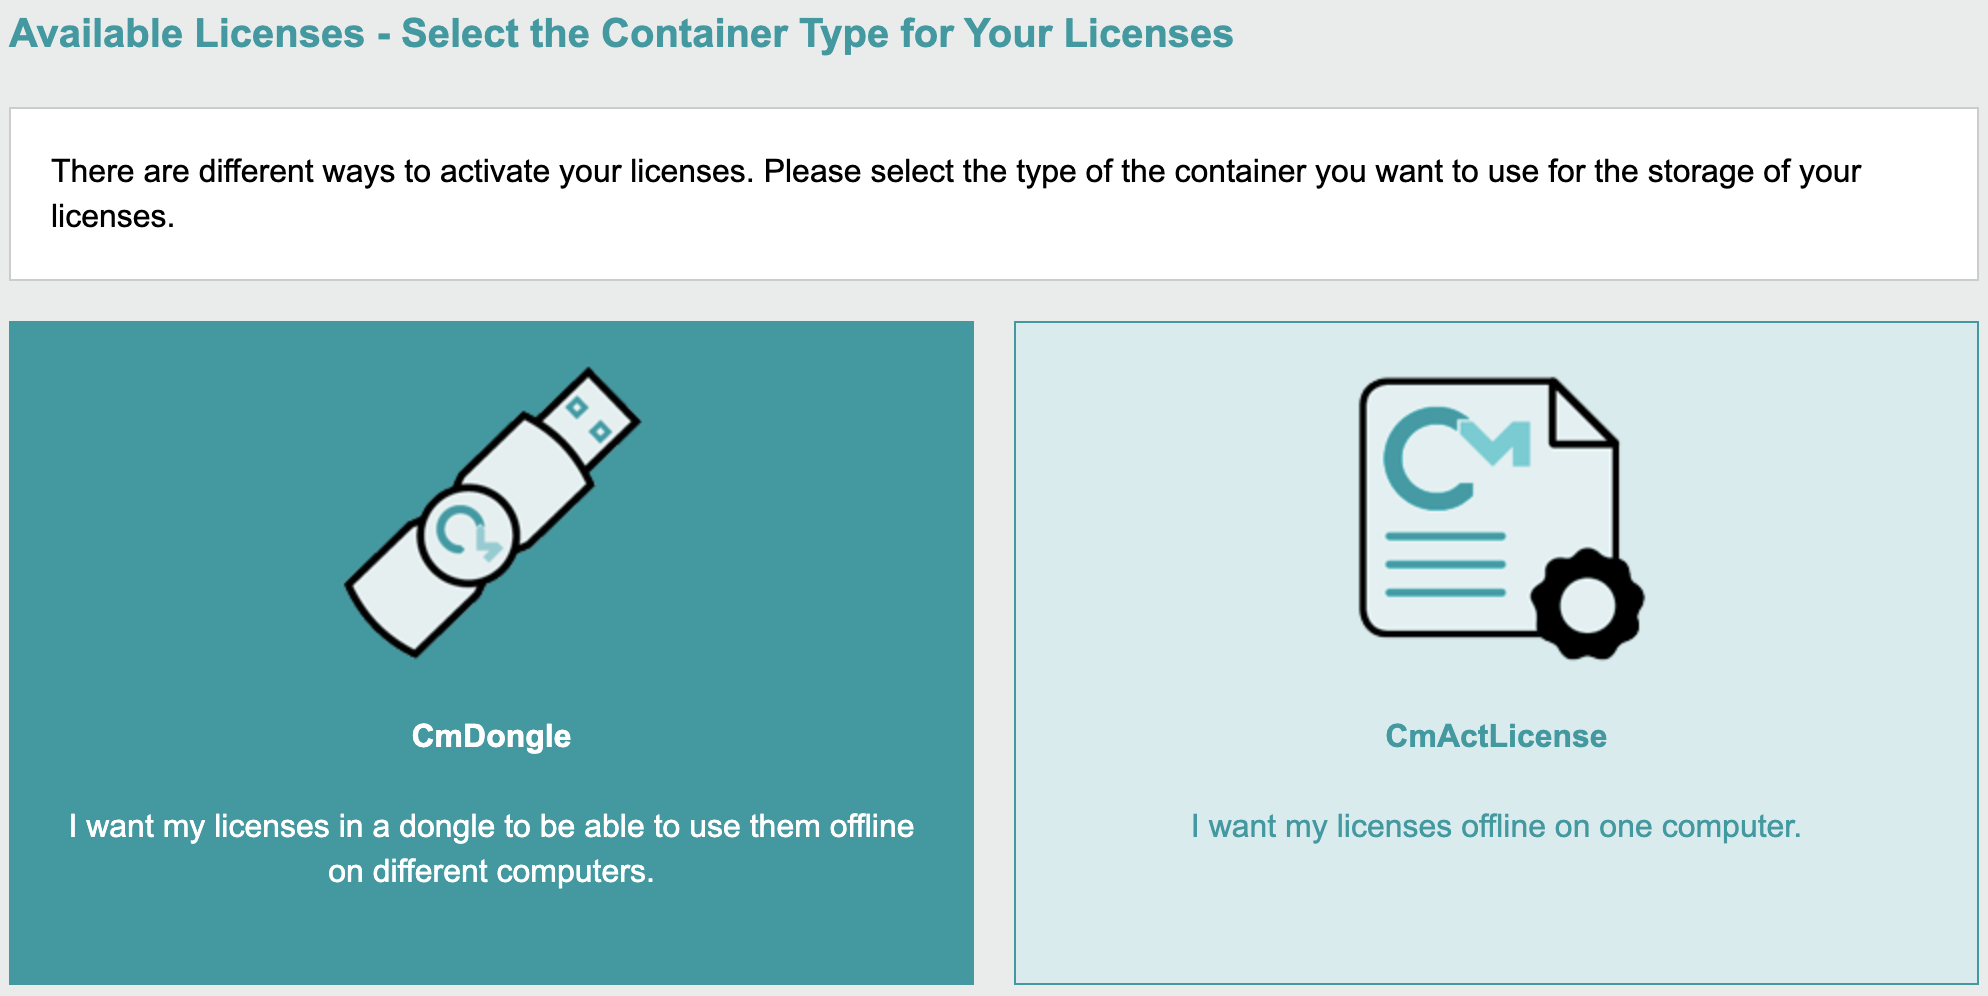
When asked whether a CmDongle or a CmActLicense should be used, select CmActLicense (Fig. 3).
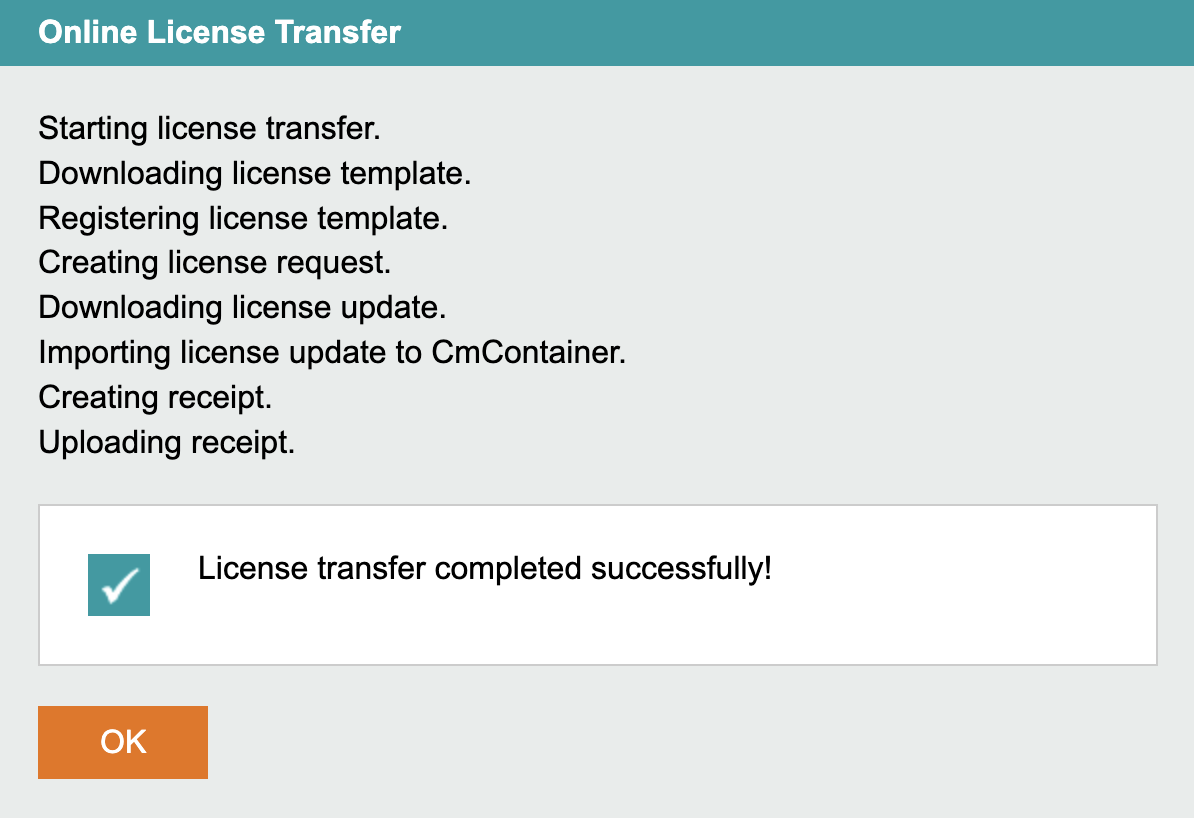
The popup (Fig. 4) shows the license transfer progress. After the license has been activated successfully, confirm and close the dialog by clicking OK.
On the list of available licenses, the activated license is now marked as Activated (Fig. 5). The license activation process is now completed.
1.1.3. Installation Instructions in voraus.pioneer Examples
Depending on your specific use case, you may also refer to the installation guide provided in the voraus.pioneer Examples. For a general approach, please proceed with the next chapter Docker Compose Environment.
1.1.4. Docker Compose Environment
The configuration of the voraus.core is defined in a compose file (docker-compose.yml).
Create a docker-compose.yml file in a persistent workspace directory. This file defines the software stack and is used for future updates, too. Alternatively, Portainer has support for compose files in the form of a Portainer Stack, which is a convenient wrapper around (Docker) compose files, allowing to work with them via a GUI. Once the compose file is uploaded to Portainer, it can be edited by opening the stack and switching to the Editor tab. Any changes must be applied by clicking the Update the stack button at the bottom of the Editor tab.
The following file shows an example compose file for a virtual robot.
 1version: "3.3"
 2
 3services:
 4  codemeter:
 5    hostname: codemeter
 6    image: wibusystems/codemeter:8.30
 7    environment:
 8      CM_REMOTE_SERVER: "host.docker.internal" # Use the CodeMeter runtime service on the host machine.
 9    extra_hosts:
10      - "host.docker.internal:host-gateway"
11    restart: unless-stopped
12
13  voraus-core:
14    image: voraus.jfrog.io/docker/voraus-core:latest
15
16    depends_on:
17      codemeter:
18        condition: service_healthy
19
20    environment:
21      # Robot control backend
22      VORAUS__components__voraus-robot-control__enabled: True
23      VORAUS__components__voraus-robot-control-py__enabled: False
24
25      # Robot specification
26      VORAUS__robot__robotType: "VORAUS_INDUSTRIAL_ROBOT"
27
28      # Licensing
29      CODEMETER_HOST: codemeter
30      VORAUS__components__voraus-license-handler__enabled: True
31      VORAUS_LICENSE_HANDLER__API_URL: http://host.docker.internal:22358
32
33    extra_hosts:
34      - "host.docker.internal:host-gateway"
35
36    ports:
37      # Port for the voraus.operator webapp.
38      # You can change it if the port 8080 isn't available,
39      # but make sure that you are changing it in later steps as well.
40      - 8080:80
41      # Port for the voraus license handler
42      - 8081:8081
43
44    restart: on-failure
45
46    volumes:
47      - "voraus_data_volume:/root/data/voraus/"
48      - "voraus_log_volume:/var/log/voraus/"
49
50volumes:
51  voraus_data_volume:
52    driver: local
53  voraus_log_volume:
54    driver: local
Most parts of the configuration are static and need no editing with the following exceptions:
The latest image for the voraus.core is used, if a specific version should be used, this image tag must be replaced with the corresponding Docker image tag.
Based on the robot model, please configure the following variables:
Based on the robot model, the VORAUS__robot__robotType variable can be modified:
Note
A manual reload of the voraus.operator in the browser is necessary, if the page is already loaded. The updated configuration of the Docker Compose file like the new VORAUS__robot__robotType will only be applied after a page refresh.
The port section of the stack configuration defines the mapping of the voraus.core ports to the ports of the host system. A port mapping consists of the following pattern:
- {host-port}:{container_port}Any port of the container can be mapped to a free port of the host system.
By default, the port of the voraus.operator is mapped from port 80 to port 8080. If port 8080 is already blocked by another service, simply adjust the mapping.
In order to start the voraus software without Portainer, execute the following terminal command within your persistent workspace:
docker compose up -d
After some seconds, the voraus.operator is available under the following http://127.0.0.1:8080.
Note
If you change the port mapping of the voraus.operator in the docker-compose.yml file, you need to change it in
the link as well.
The software can be stopped by executing:
docker compose down