
Download and Work Locally
Run examples locally on your computer:
Installation
Note
If you have not yet received a license, request a license for the voraus.pioneer Examples now.
Docker and the CodeMeter Runtime (for licensing) are required to run the examples. Follow the installation guide for the voraus.core in a virtual environment to prepare your system and activate licenses.
VS Code and Docker
Our software is provided as Docker images and can therefore be easily integrated into modern software development environments. In this example, Visual Studio Code (referred to as VS Code in the following) is used as the integrated development environment (IDE), but you can use the IDE of your choice.
Install VS Code Dev Containers
The VS Code extension Dev Containers enables user-friendly development within Docker containers. If you are interested in further information, read the articles Developing inside a Container and Dev Containers tutorial .
Open VS Code, click Extensions, and search for Dev Containers. Click Install and wait until the installation is complete (Fig. 2).
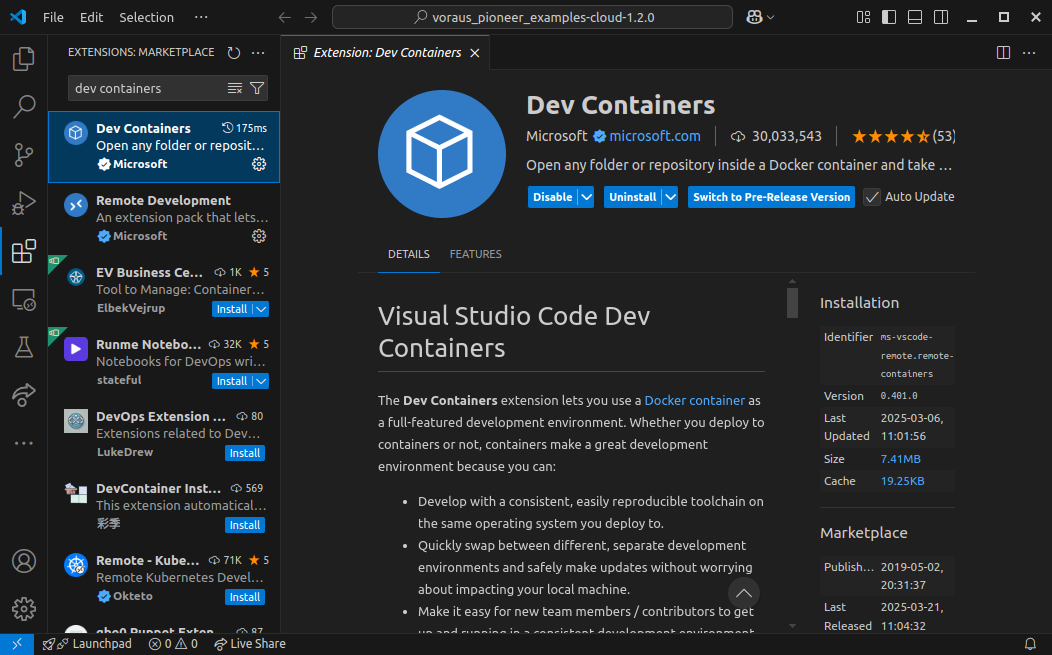
Dev Container Example
The folder structure of the downloaded 📂voraus-pioneer-examples is shown below.
📂voraus-pioneer-examples/
  📂pick_and_place/
    📂assets/
    📂control_robot/
      🖹program.py
      🖹robot_visualization.py
    📂...
    🖹devcontainer.json
    🖹docker-compose.yml
  🖹common-services.yml
  🖹...
The 🖹common-services.yml file describes the common configuration of voraus services.
The 📂pick_and_place/ folder contains the pick-and-place example, with 3D models inside the 📂assets/
folder and Python scripts such as 🖹program.py. The 🖹docker-compose.yml file describes which Docker
containers must be started in which configuration. The 🖹devcontainer.json file describes how VS Code attaches
the remote session to the dev container.
Open Dev Container
Open the folder 📂pick_and_place/ in VS Code, press Ctrl + Shift + P, and select
Dev Containers: Reopen in Container, as shown in Fig. 3.
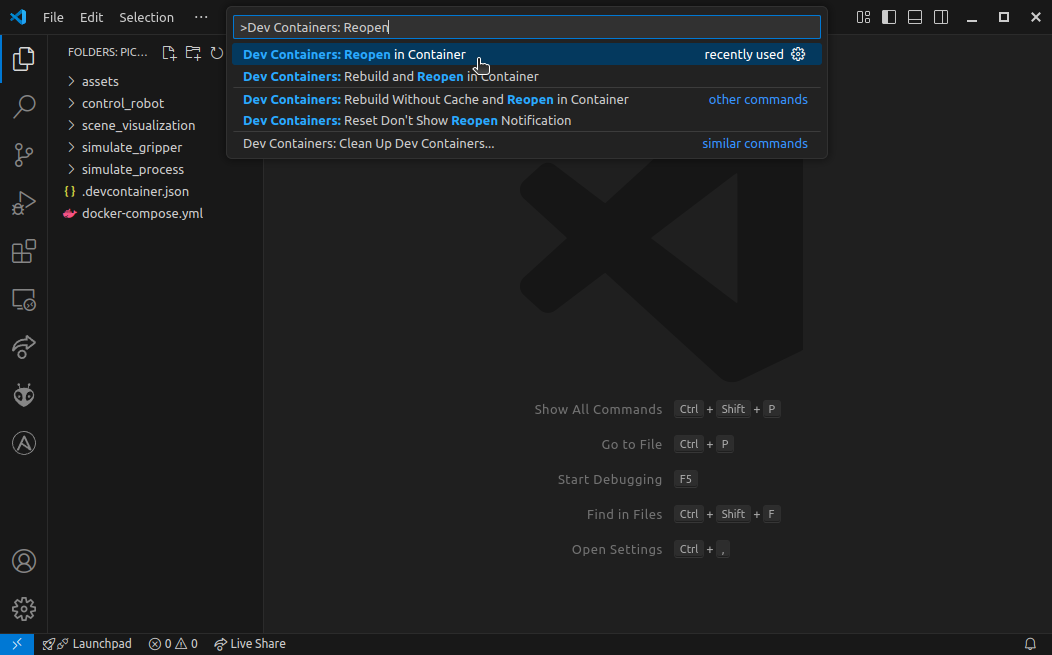
It takes a moment for the dev container to start.
Note
If you have problems while starting the dev container, try Dev Containers: Rebuild and Reopen in Container to make sure the Docker containers are recreated.
Select Python Interpreter
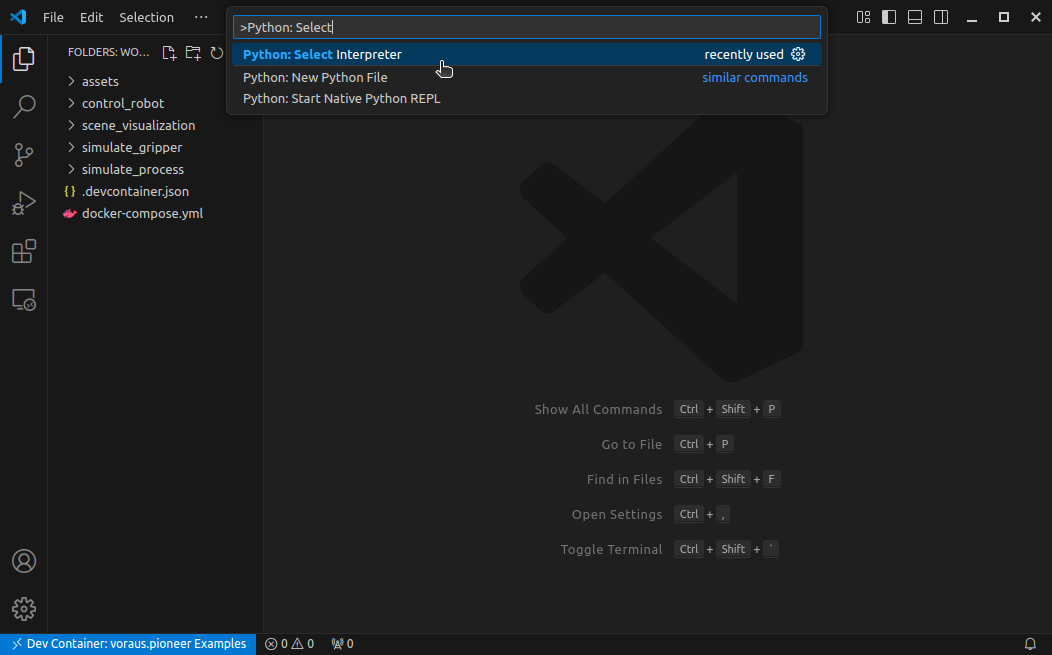
If VS Code does not recognize the Python interpreter by itself, press Ctrl + Shift + P, search for Python: Select Interpreter, and click it (Fig. 4).
Select /usr/bin/python in the following menu, as shown in Fig. 5. From now on, Python autocompletion, syntax highlighting, and type hinting are available to you.
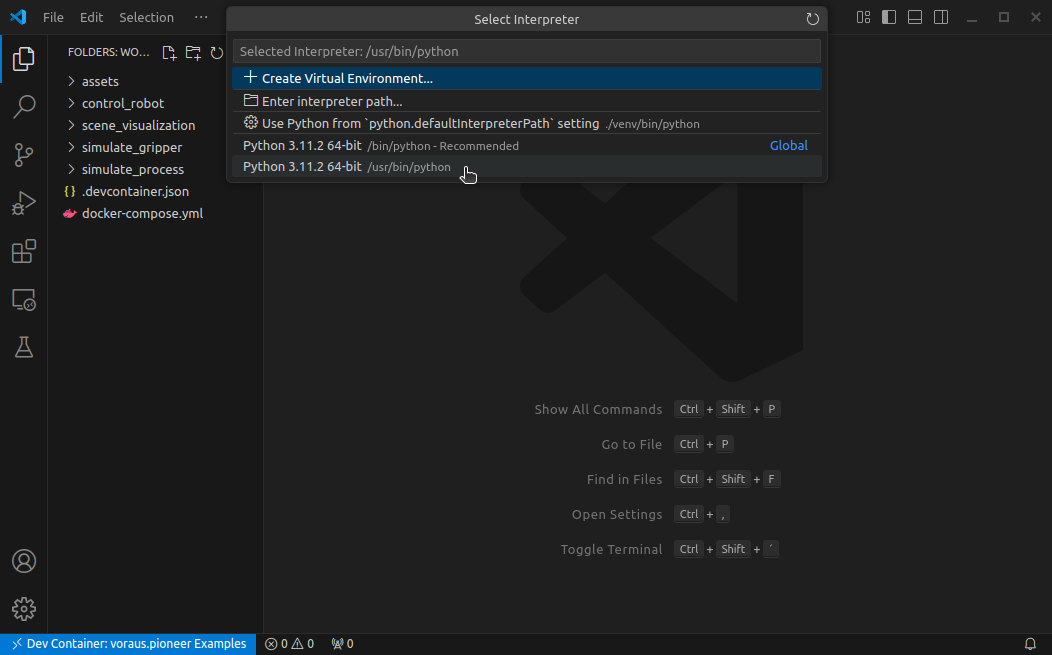
Fig. 5 Selecting the Python interpreter of the Docker container
Embed 3D Visualization
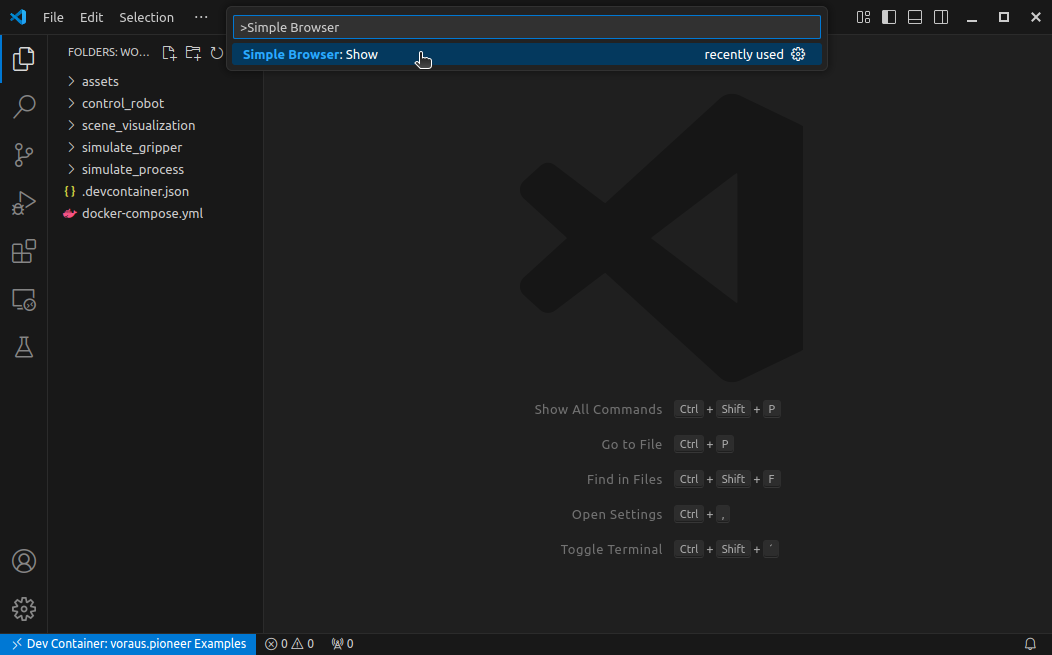
To display the 3D visualization directly in VS Code, press Ctrl + Shift + P, search for Simple Browser: Show, and click it (Fig. 6).
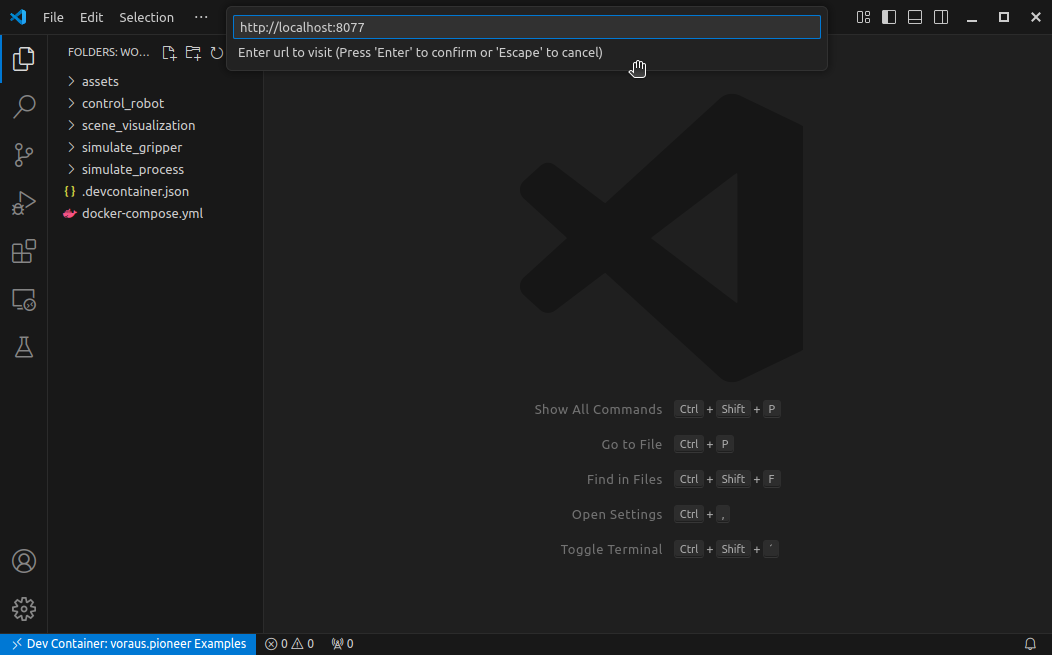
Enter the local URL of the 3D visualization http://localhost:8077 in the following menu,
as shown in Fig. 7, and press Enter.
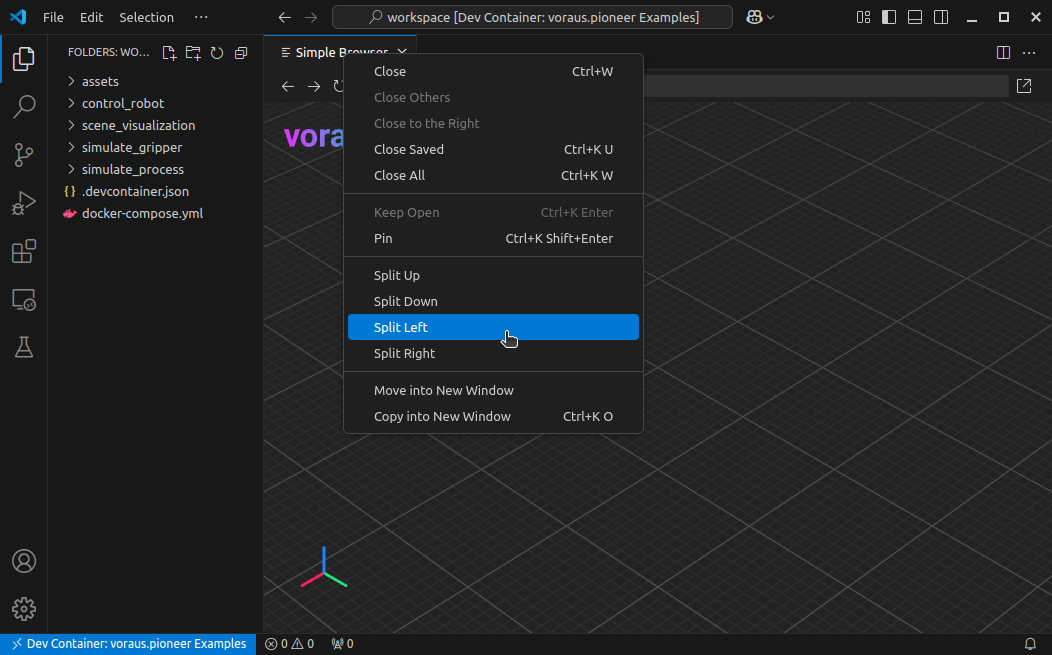
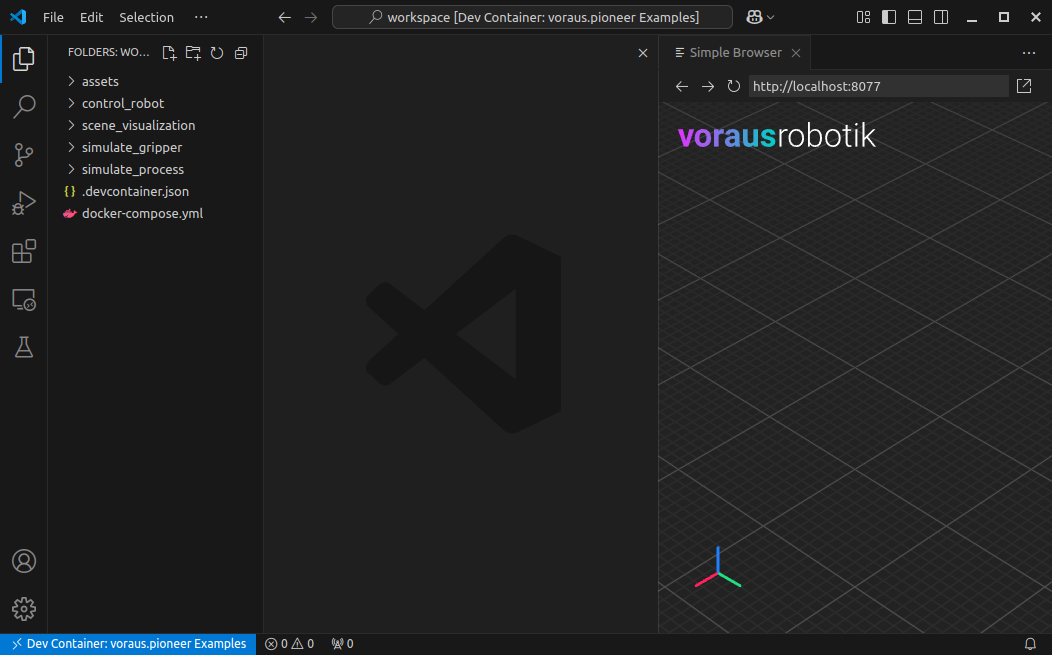
The 3D visualization is now displayed in the VS Code Simple Browser. For efficient development, the screen can be split so that you can see both the Python code and the 3D visualization at the same time. To do this, right-click Simple Browser and then select Split Left, as shown in Fig. 8.
As shown in Fig. 9, the 3D visualization is now displayed on the right side of the screen.
Note
Displaying the 3D visualization directly in VS Code is practical for development, but performance problems can occur with large 3D scenes in the Simple Browser. In these cases, use a web browser such as Chrome.
To do this, open http://localhost:8077 in your web browser.
Open a Terminal
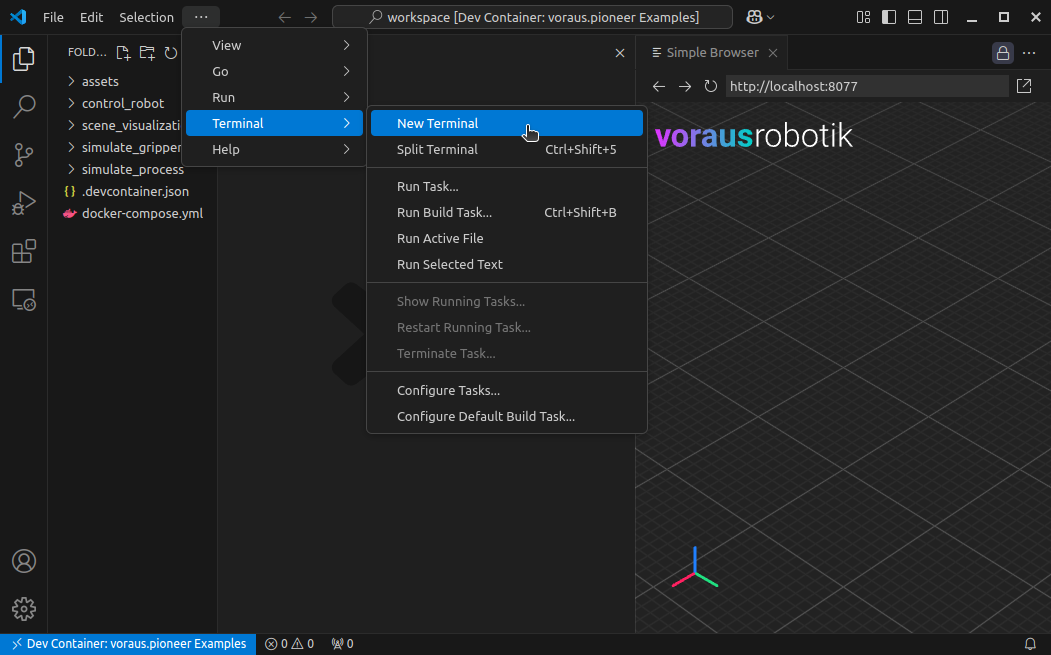
During development, you need a terminal to execute Python scripts. To do this, click New Terminal under the Terminal menu item, as shown in Fig. 10.
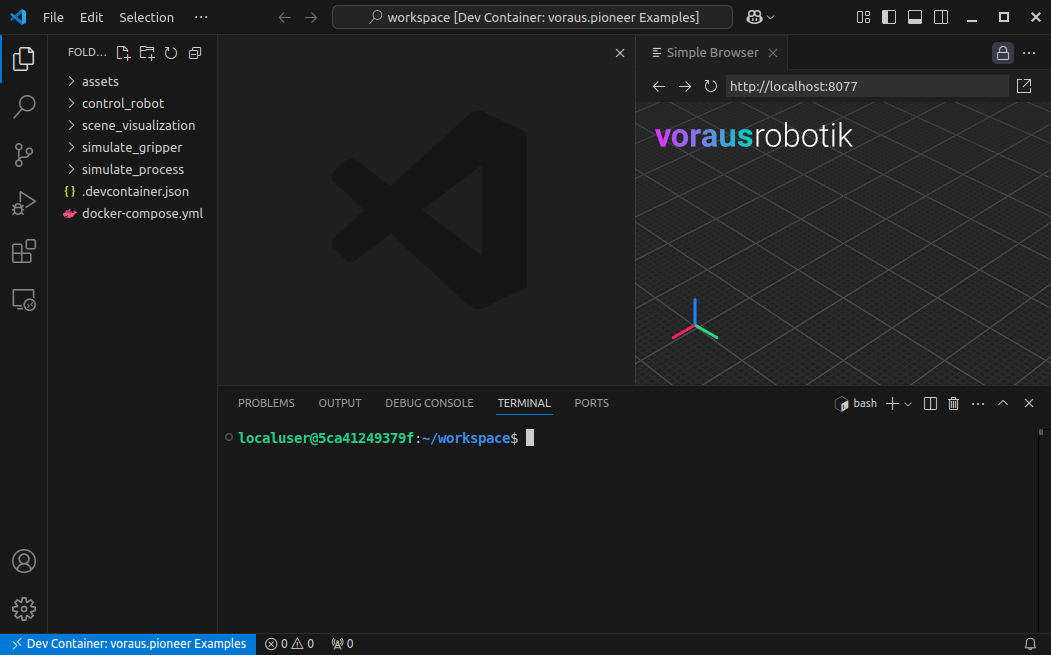
The terminal is now displayed at the bottom of the screen, as shown in Fig. 11. In the following examples, you can enter the commands here. If you need a second terminal to execute scripts in parallel, you can also split the terminal by clicking Split Terminal at the top right of the terminal window.
Open voraus.operator
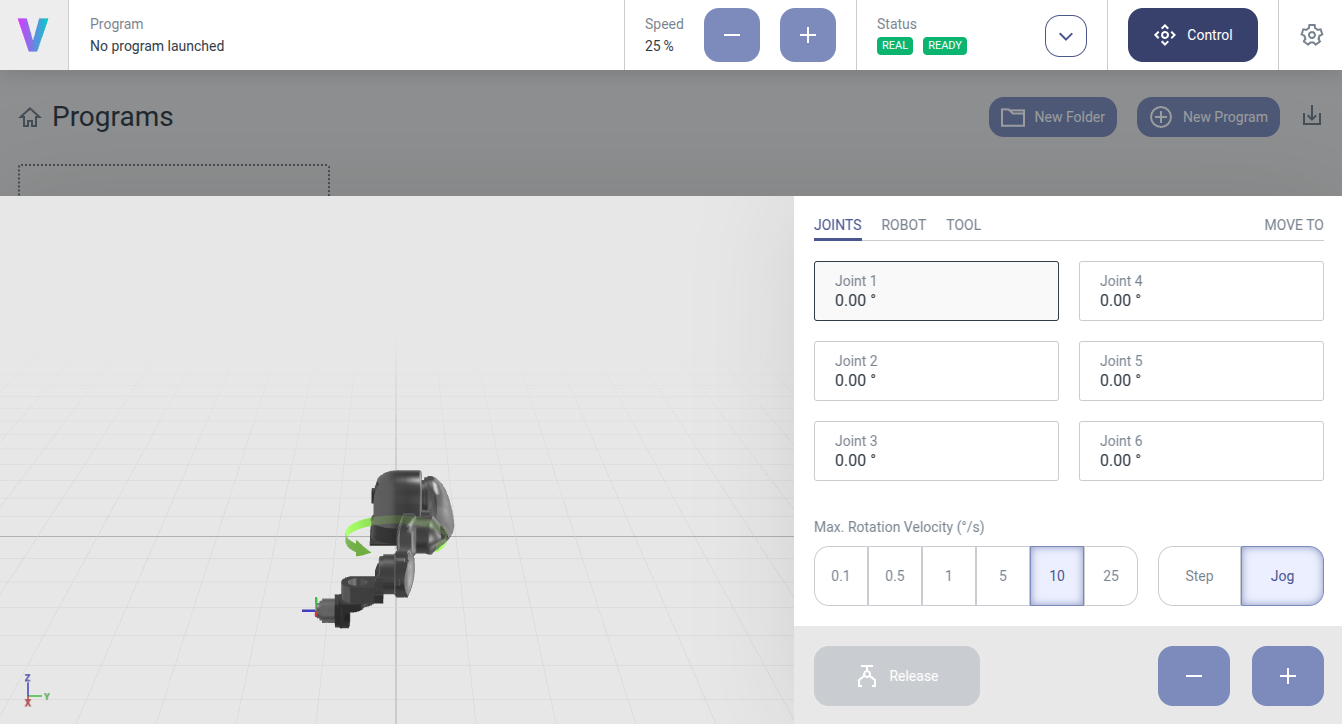
The voraus.operator can be accessed via http://localhost:8080/ with your web browser, as shown in Fig. 12. The voraus.operator can be used for jogging the virtual robot, setting digital I/Os, or resetting errors.
For further information, for example, on resetting errors and setting the robot speed, read the voraus.operator documentation.
Leave Dev Container
When you are finished with the development, you can leave the dev container by pressing Ctrl + Shift + P, searching for Dev Containers: Reopen Folder Locally, and clicking it.
Next Steps
Now everything is set up, and you can continue with the Pick-and-Place Example.